
Memory Palace
How to Build a Memory Palace: A 7-Step Beginner's Guide (With Worked Examples)
A practical seven-step walkthrough for building your first memory palace, choosing the place, fixing the route, placing the images, and locking it in for the long term.

Building your first memory palace is easier than you think and harder to do badly than you'd expect. If you are new to it, expect to be surprised by how quickly it starts working, and how stubbornly the information sticks once it does.
Here is the whole seven-step process from start to finish, with worked examples you can follow as you read.
Before You Begin: What You'll Need
You don't need anything physical to build a memory palace. No app, no notebook, no special software. What you do need is around fifteen quiet minutes and a willingness to play. The technique relies on imagination, and imagination switches off the moment you try to be perfect.
A couple of things worth setting up before you start:
- A relaxed, focused state. You'll memorise faster when your body is loose. Drop your shoulders. Take three slow breaths. This is getting into flow, the relaxed-but-energised state where your mind stops gripping and starts moving.
- A timer (optional). Setting a 15-minute timer keeps you out of the trap of over-thinking.
- Something to remember. It's much easier to learn the technique if you're actually using it for something real. Pick a list of 10 to 20 things you want to memorise, a presentation's key points, a shopping list, the chapters of a book, fifteen items of foreign-language vocabulary.
Ready? Let's build it.
Step 1: Choose Your Place
The first thing to choose is where your palace will be.
Here is a familiar piece of bad advice: you must use a place you already know inside out. That is a misconception. The real requirement is simpler: you need to be able to recall the specific locations in order. A place you already know well is quick to set up, which is exactly why it is the best choice for your first palace. But it is not the only choice, and it is not a rule.
You can build a perfectly good palace from a town you have never visited. LOCI builds memory palaces from Google Street View or with AI, so you can walk a street anywhere in the world, observe each location for a few seconds, and lock the sequence into your mind. That observation step is how you make any place familiar enough to use, usually in around five minutes. Familiarity is something you create, not something you must have in advance.
For your very first palace, start with somewhere you already know, because it removes one variable while you learn the technique. Good first-palace choices include:
- Your current home (best for absolute beginners)
- A previous home you lived in for years
- Your parents' house if you grew up there
- Your office or workplace, a bar, or a restaurant
- A regular walking route, your daily walk, your gym route, your school run
- Your local high street or town centre
- A virtual location in LOCI (a town anywhere in the world from Street View, or a palace generated with AI)
Once you have a few candidates in mind, pick one. Don't agonise over it. The best memory palace is the one you actually build.
Step 2: Plan Your Route
Now you need a route through your chosen place. A specific, repeatable path you'll always walk the same way.
If you're using your home, start at the front door. Walk through it. Which room do you enter first? Where does your eye land? Which room do you go to next? Plan a clear, single route through the whole space, with no backtracking and no ambiguity.
Here is an example route through a home, starting at the front door:
- Front door → 2. Hallway table → 3. Stairs → 4. Living room sofa → 5. Living room window → 6. TV → 7. Bookcase → 8. Kitchen doorway → 9. Kettle → 10. Fridge…
…and so on until you have your target number of locations.
Critical rule: the route should never branch or fork. Each location should have exactly one location before it and one after it. This is what allows you to recall the information in order, and to run it backwards if you want to.
Step 3: Pick Your Memory Files (Your "Nodes")
A memory file, or as some teachers call them, a node, is a single spot in your palace where you'll place one piece of information. In each room of your palace, you'll choose a small number of items to act as your memory files.
Here's a simple system for beginners. It's based on the Roman Room method, which stores items around the objects in a single room, but it works for any space:
- Walk into a room
- Pick the first thing your eye naturally lands on
- Then, moving clockwise around the room, pick the next four items
- That gives you five memory files per room
For a typical living room, you might end up with: sofa, curtains, coffee table, TV, bookcase. That's five files. Move to the next room and pick five more.
A rule of thumb: build your palace in chunks of 5. Five files per room, or five files per "block" if you're walking a route. Chunking like this makes the whole palace much easier to recall, and it keeps a big palace manageable.
For your first palace, aim for 20 files in total, that's four rooms with five items each. It's enough to be useful and not enough to be intimidating.
Step 4: Lock In the Sequence
Before you place anything on the palace, you need to make sure the palace itself is rock solid. The locations need to come back to you automatically, without effort. This is true whether you are using your own kitchen or a street you found in LOCI ten minutes ago. Locking in the sequence is how you get there.
Here's the process:
- Get yourself into a relaxed, focused state
- Imagine your first location vividly. Say its name out loud
- Imagine the next location. Say its name out loud
- Continue through all your locations in order
- Now do it in reverse, last location to first
- Repeat the forwards-and-backwards run three times
- Then run through it forwards as quickly as you can
For a 20-location palace, this whole process usually takes around five minutes the first time, and under a minute with practice.
Test yourself. Look away from any notes and try to name all 20 locations in order, both forwards and backwards. If you stumble, repeat the forwards-backwards run. The palace is only worth using once the sequence is automatic.
Step 5: Turn What You Want to Remember Into Images
This is the step that trips beginners up the most. Your palace stores images, not words. So before you can place anything, you need to turn the words you want to remember into mental pictures.
A few principles that make this easier:
Use natural images for concrete words. "Apple" already is an image. "Hammer" already is an image. Don't overcomplicate it, just see the thing.
Use sound-images for abstract words. If a word is abstract or has no obvious picture (say, "democracy" or "synthesis"), pick something that sounds like it. Democracy → demo-crazy → a wild man holding up a "DEMO" sign and screaming. Synthesis → syn-thesis → a thesis paper with a sin glowing in red on the cover.
Use the MIN rule, Minimum Images Necessary. You don't need to translate every single word into an image. Just enough to trigger the memory of the full idea.
Make the images strange, vivid, exaggerated, moving, emotional. Boring images won't stick. Make the apple huge. Make the hammer on fire. Anything funny, bizarre, sexy or unique is naturally more memorable.
Test with a quick example. Say you want to remember that the French for cheese is fromage. There is no natural picture for the word, so use the sound: a frog on a stage, taking a bow with a wedge of cheese held above its head. Say "fromage, cheese" out loud as you see it. It's ridiculous. It works. Two seconds and the word is in, and that is the kind of image you will be placing on every location.
Step 6: Place the Images Along the Route
Now you put it all together. Walk your palace mentally, and at each location, place the relevant image in a way that interacts with the location itself.
A bad placement: imagining an apple, then imagining your sofa, then telling yourself "the apple is on the sofa."
A good placement: the apple is so big it's squashing the sofa, and juice is dripping onto the floor, and you can smell the apple, fresh-cut, slightly sour.
The interaction is everything. The more your image does something to the location, the stronger the memory.
Place your images five at a time. Place five, then close your eyes and test those five. Then place the next five and test those. Then test all ten together. Then place the next five. Chunking like this helps more of it stick.
A tip if pictures don't stick: imagine a dial in front of you, numbered 1 to 10. If the image is currently at a 4 in vividness, mentally turn the dial up to 7. Wait. Notice what happens. It is a quick way to access the unconscious and bring the image to life. The technique is called dial it up.
Step 7: Test, Review, Lock It In
Once all the images are placed, you need to lock the palace into long-term memory. The biggest mistake beginners make is to build a beautiful palace, feel pleased with themselves, and then walk away forever. Without review, the images fade.
Here's a simple review schedule:
- Immediately: run the palace forwards once, then backwards once. Speak each item aloud as you go.
- One hour later: walk the palace once.
- The next day: walk it once.
- One week later: walk it once.
- One month later: walk it once.
That's it. Five short reviews and the information is in your long-term memory.
If you're using the palace for something temporary (like an audition, a single presentation, a one-off exam), skip the long reviews. Use the palace, then leave it alone for 2 to 3 days and the images will naturally fade. The palace is now reusable for the next thing.
If you're using the palace for something permanent (a body of professional knowledge, a play you're touring, a lifetime of vocabulary), keep reviewing.
A Worked Example: The Sevenoaks Palace
Here is a real palace, built from a high street.
I take the centre of Sevenoaks, the town near where I live. Walking it on Street View in LOCI, I pick 13 locations along the high street, a chair outside a café, a shop window, the sign above a pub, a doorway, a postbox, a parked car, another window, a streetlight, a chimney, a Nationwide branch, a flower bed, the barbers, a café table.
Then I place 13 images along that route. Here's what happens at each location:
- On the chair sits a giant dartboard
- An explorer smashes through the shop window
- Hanging beneath the sign, dangling like fruit, are light bulbs
- A chess board is sticking out of the doorway, half-toppling
- A motorcycle is accelerating around the postbox
- Plastic letters are stuck to the car
- A calculator is climbing in through the next window
- The streetlight is playing a trumpet
- A picture of the Mona Lisa is balancing on the chimney
- Arnold Schwarzenegger is flexing his biceps outside Nationwide
- A love heart is growing out of the flower bed
- I'm working out outside the barbers
- A gigantic apple is sitting on top of the café table
It takes about five minutes to build a palace like this the first time, and around one minute with practice. (And if you've read What is a Memory Palace? A Beginner's Guide to the World's Oldest Memory Technique, you'll notice those 13 images are the chapter titles of The Memory Workbook, Get Results, Explore Your Memory, Creative Memorisation, Memory Strategies, Accelerated Learning, Memory for Word Smarts, Memory for Number Smarts, Memory for Musical Smarts, Memory for Picture Smarts, Memory for Body Smarts, Memory for Emotional Smarts, The Memory Workout, Apply Your Memory Skills.)
Common Mistakes to Avoid
Using locations you can't recall reliably. The test is not whether the place is familiar, but whether you can walk the locations in order without hesitating. If you keep losing your place, spend a few more minutes observing each location to lock it in, or pick a route you can recall more easily.
Building too big a palace too soon. Start with 20 files. Master that. Then expand. A 100-file palace is much easier to build once you've built a 20-file palace twice.
Placing images on top of locations rather than interacting with them. "The apple is on the sofa" is weak. "The apple is squashing the sofa flat, juice dripping" is strong.
Trying to be perfect. Your images don't need to be photographic. A vague sense, a sound, a description in your head, all of these work. Get out of your own way.
Skipping the review. A palace without review fades. A palace with five short reviews lasts for years.
Where to Go Next
Now that you've built your first palace, the natural next steps are:
- Use it for something real. How to Memorise a Speech with a Memory Palace (No Notes Needed) is the most rewarding first use case.
- Build a study palace. Using a Memory Palace for Studying: A Smarter Way to Memorise Vocabulary, Anatomy and Exam Content is where a palace pays off fastest if you are studying.
- Learn the chain method for short lists where you don't want to build a full palace. See The Chain Method: How to Remember Lists Without Building a Memory Palace.
Memory map
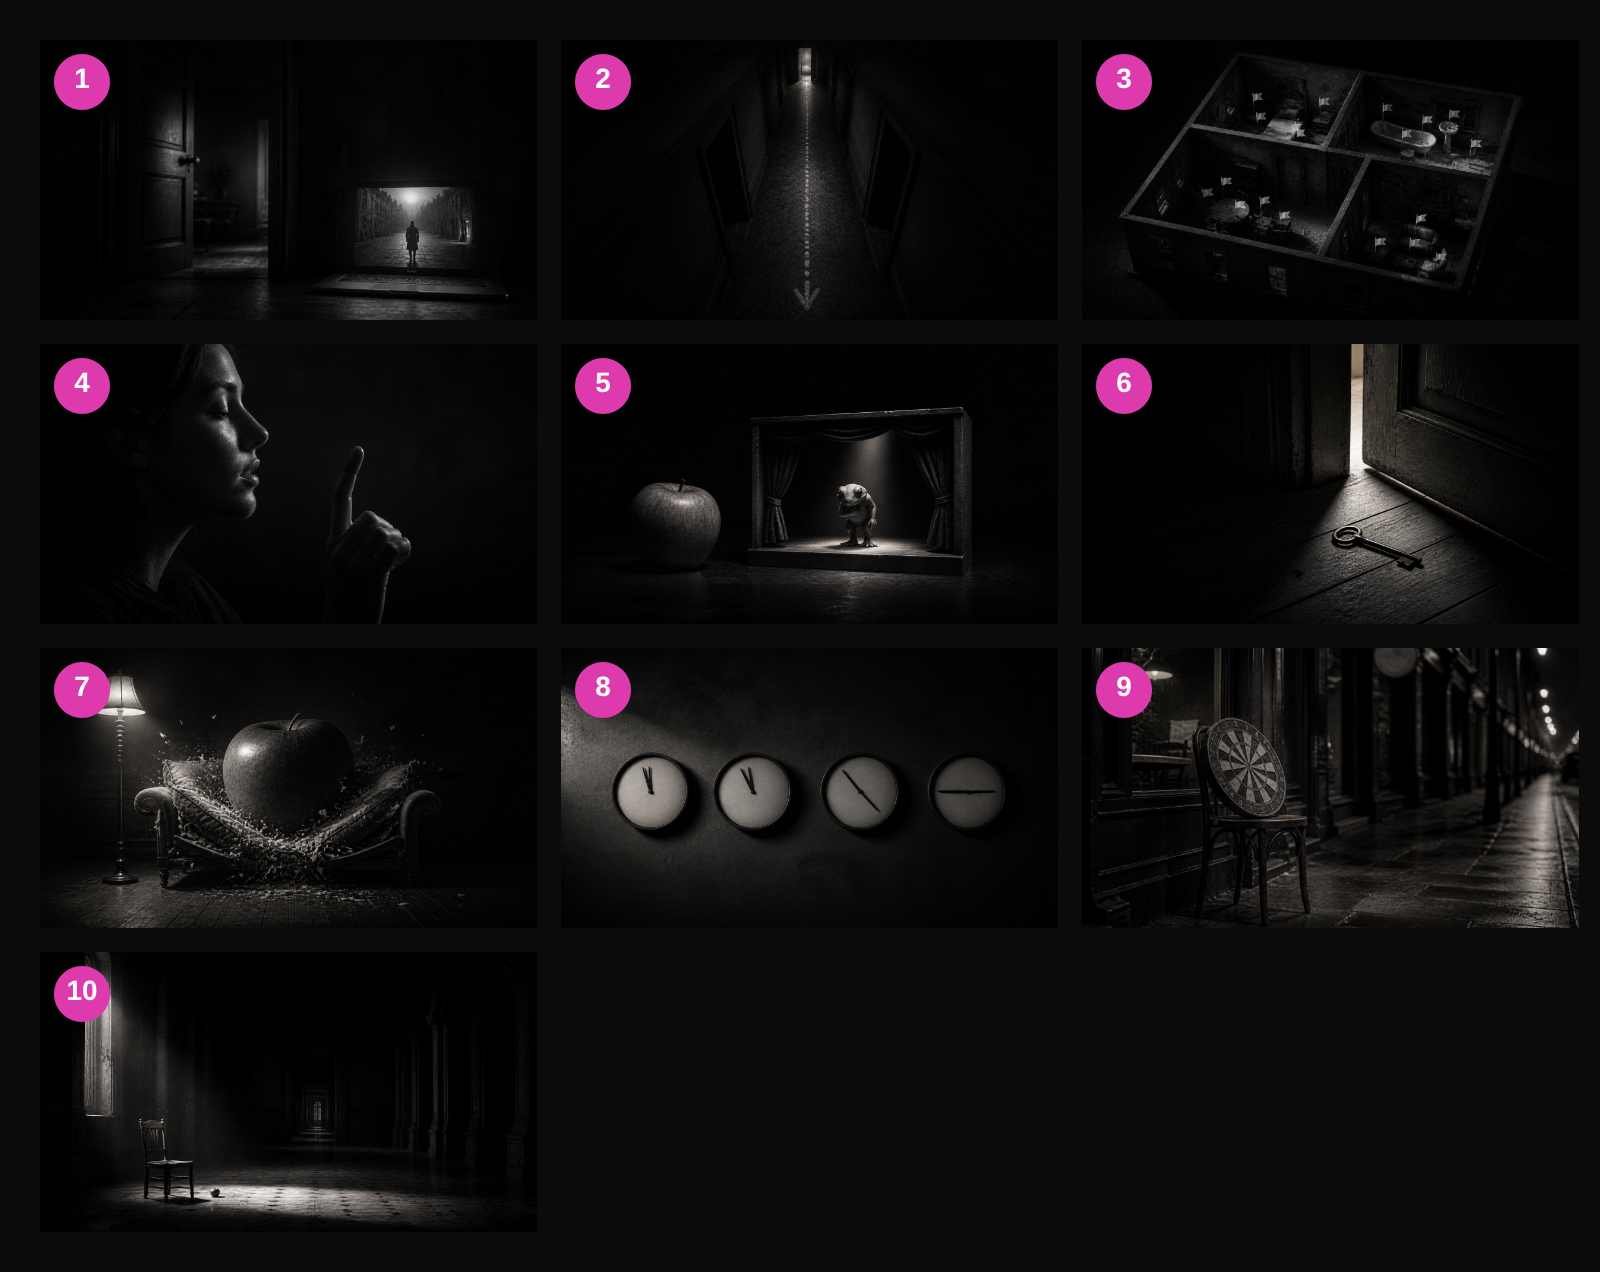
- Choose your place: somewhere you can recall in order, familiar or not. Image: a front door beside a small figure dropped onto a strange pavement on a laptop screen.
- Plan a single route through it with a clear start and finish. Image: a dotted line running through a floor plan, an arrow at each end.
- Pick your memory files: distinct, fixed items in order, five per room, twenty to start. Image: twenty small flags planted around four rooms.
- Lock in the sequence: observe each for a few seconds, then run it forwards and backwards. Image: a person with eyes closed, mouthing a list, finger ticking along.
- Turn information into images: natural images for concrete words, sound images for abstract ones. Image: a real apple next to a frog taking a bow on a tiny stage.
- Use the MIN rule: minimum images necessary. Image: a single key lying beside an open door.
- Make images strange, huge, moving and emotional, and make them interact with the location. Image: an enormous apple crushing a sofa, cushions bursting out.
- Test, then review at one hour, one day, one week, one month. Image: four clocks on a wall, each showing a longer gap than the last.
- The Sevenoaks palace: thirteen locations down a high street, built in LOCI. Image: a dartboard on a café chair outside a row of shops.
- Biggest mistakes: locations you cannot recall, too big too soon, images that only sit next to things. Image: a sprawling mansion with a tiny apple placed politely beside a chair.
Sources
- Mark Channon, How to Remember Anything (Hodder Education)
- Mark Channon, The Memory Workbook (Hodder Education)
- Cepeda, N. J., Pashler, H., Vul, E., Wixted, J. T., and Rohrer, D. (2006). Distributed practice in verbal recall tasks: a review and quantitative synthesis. Psychological Bulletin, 132(3), 354 to 380. https://doi.org/10.1037/0033-2909.132.3.354 (the home for this study is The Spacing Effect (Cepeda 2006) Explained)
Frequently asked questions
Are you old school? Get Mark's book Improve Your Memory and dive in depth.
Loci
Build the memory palace in this article inside Loci — store your locations, link images, and rehearse with spaced repetition.
Try it in LociMemory School community
Learn directly with Mark inside the Memory School community on Skool — monthly lessons, practice, and Q&A.
Join Memory SchoolAbout the author
Mark Channon
Grand Master of Memory (1995). Author of three books on memory published by Hodder and Nick Hern. Creator of BBC1's Monkhouse's Memory Masters. Memory coach on Channel 4's Can I Improve My Memory?
Read full bio →